Books are incredible, as there are infinite possibilities for what can be contained in their pages. They can house anything from knowledge for study, tasty recipes, personal diaries or grand adventures for you to embark on in your imagination.
These are just a few of the possibilities, and as much fun as it is to read a book, it can also be great to learn how to draw an open book.
Drawing an open book can actually be harder than you may think, however!
With this step-by-step guide on how to draw an open book, you will see that it can also be as simple as turning a page!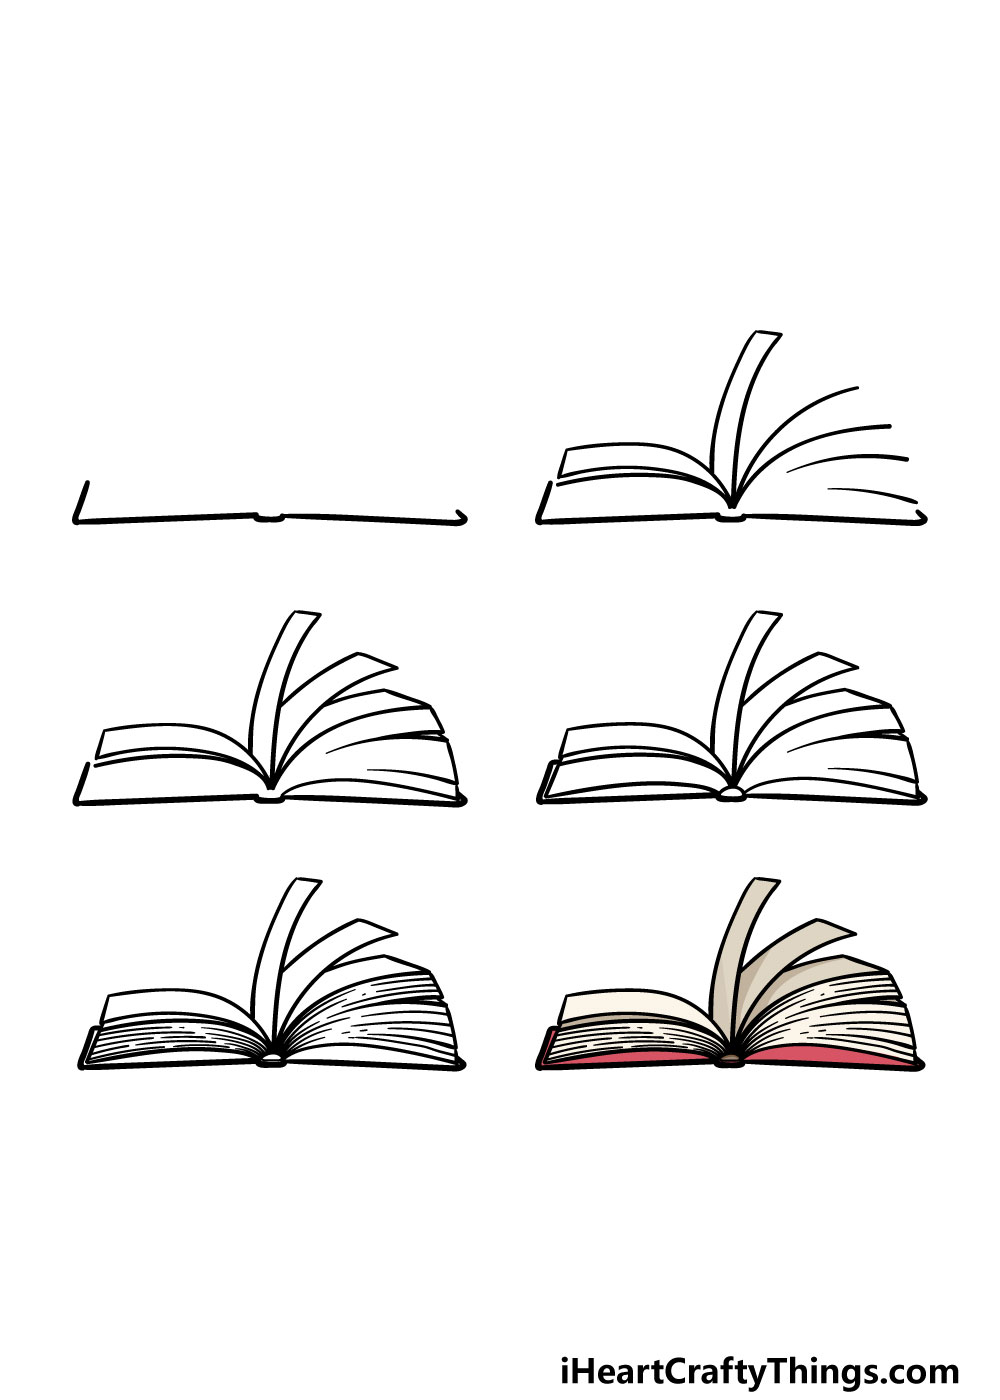
What's in this Blog Post
- How to Draw An Open Book – Let's Get Started!
- Step 1
- Step 2 – Draw the flapping pages in this step
- Step 3 – Next, draw some more detail for the pages
- Step 4 – Now, draw the rest of the cover
- Step 5 – Finish off the final details and elements
- Step 6 – Finish off your open book drawing with some color
- Your Open Book Drawing Is Complete!
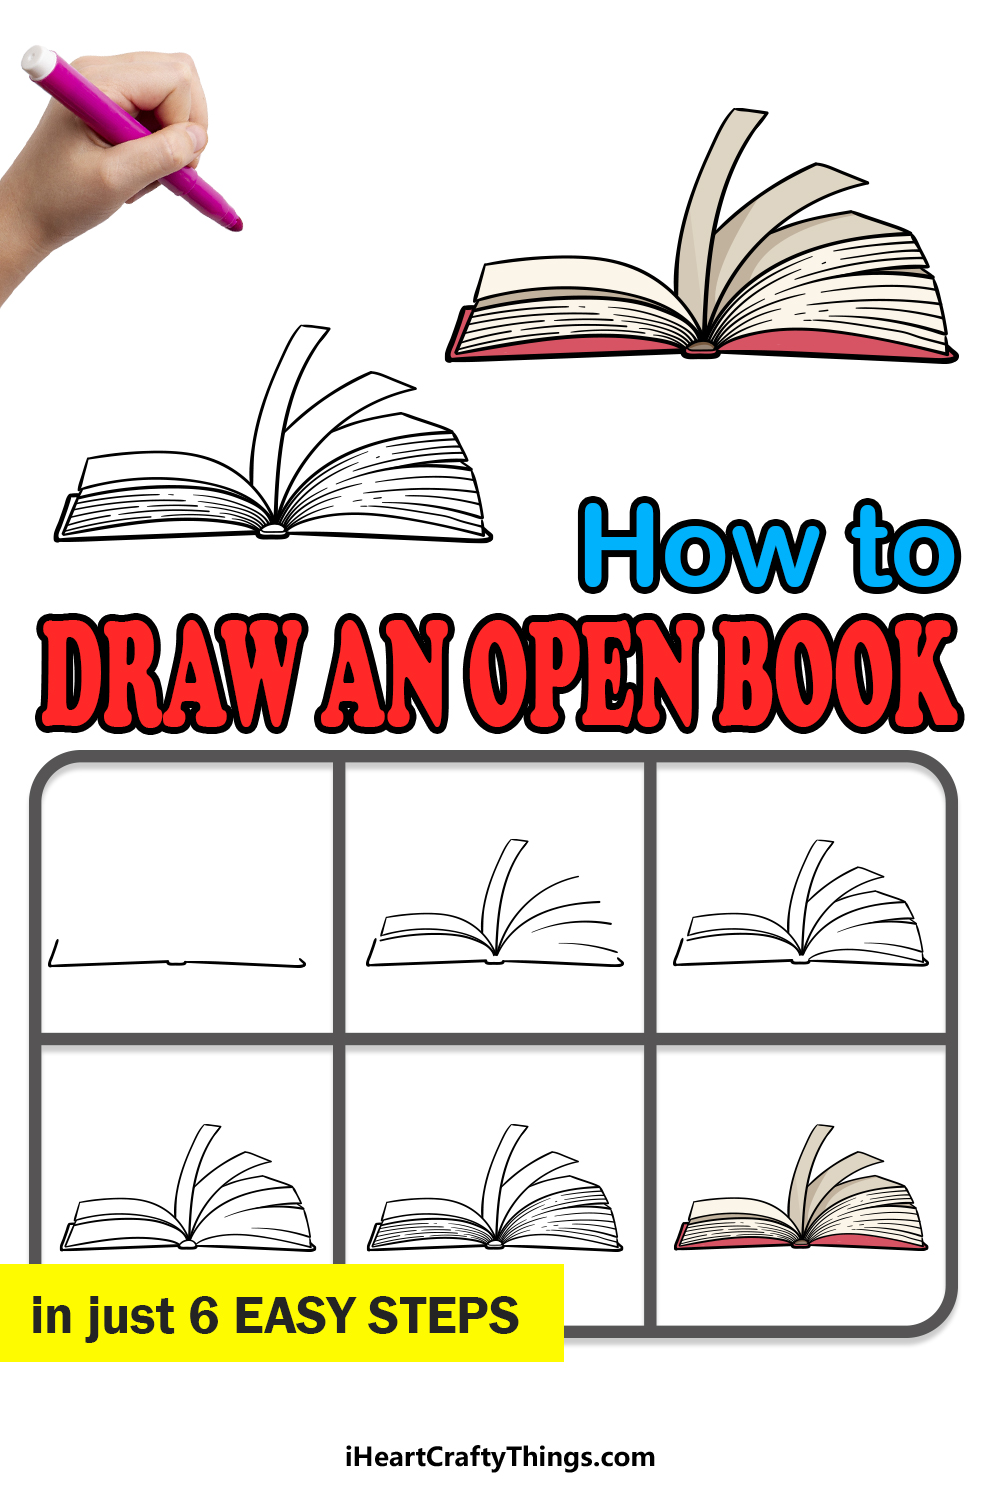
How to Draw An Open Book – Let's Get Started!
Step 1
In this guide on how to draw an open book, we will be drawing a book lying flat on a surface that has its pages flapping in the wind. To start with, we will be drawing the spine laying flat on the surface.
For this step (and a few upcoming steps) you may want to have a ruler on hand to make it easier for yourself.
You will be drawing a straight line for each half of the cover, and they should be around the same length if possible. They will also be angled ever so slightly, and there will be a small square shape at the center of them.
Then, you can draw some lines coming up from the ends of the covers. The one on the left-hand side will be fairly long, whereas the one on the left will be quite short.
Step 2 – Draw the flapping pages in this step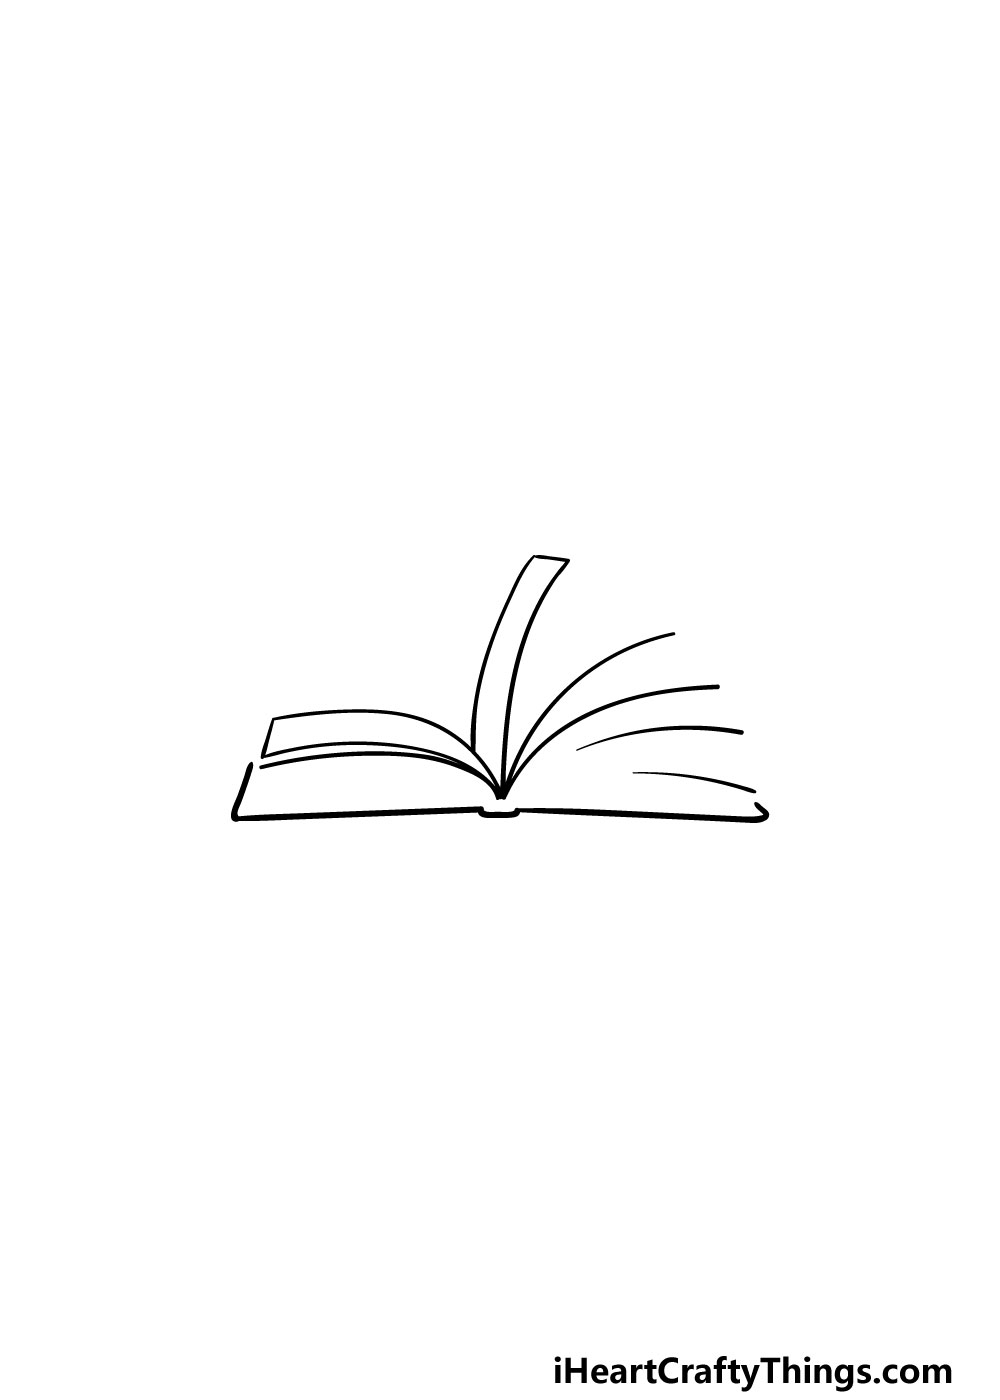
The pages of your open book drawing will be flapping as if caught in a strong breeze, and we will start to draw these pages in this step.
To draw these flapping pages, we will be using a combination of some thin, curved rectangle shapes and erratic lines.
The reference image will show you what we mean by this, and it should make it much easier as you draw if you refer to it closely.
Step 3 – Next, draw some more detail for the pages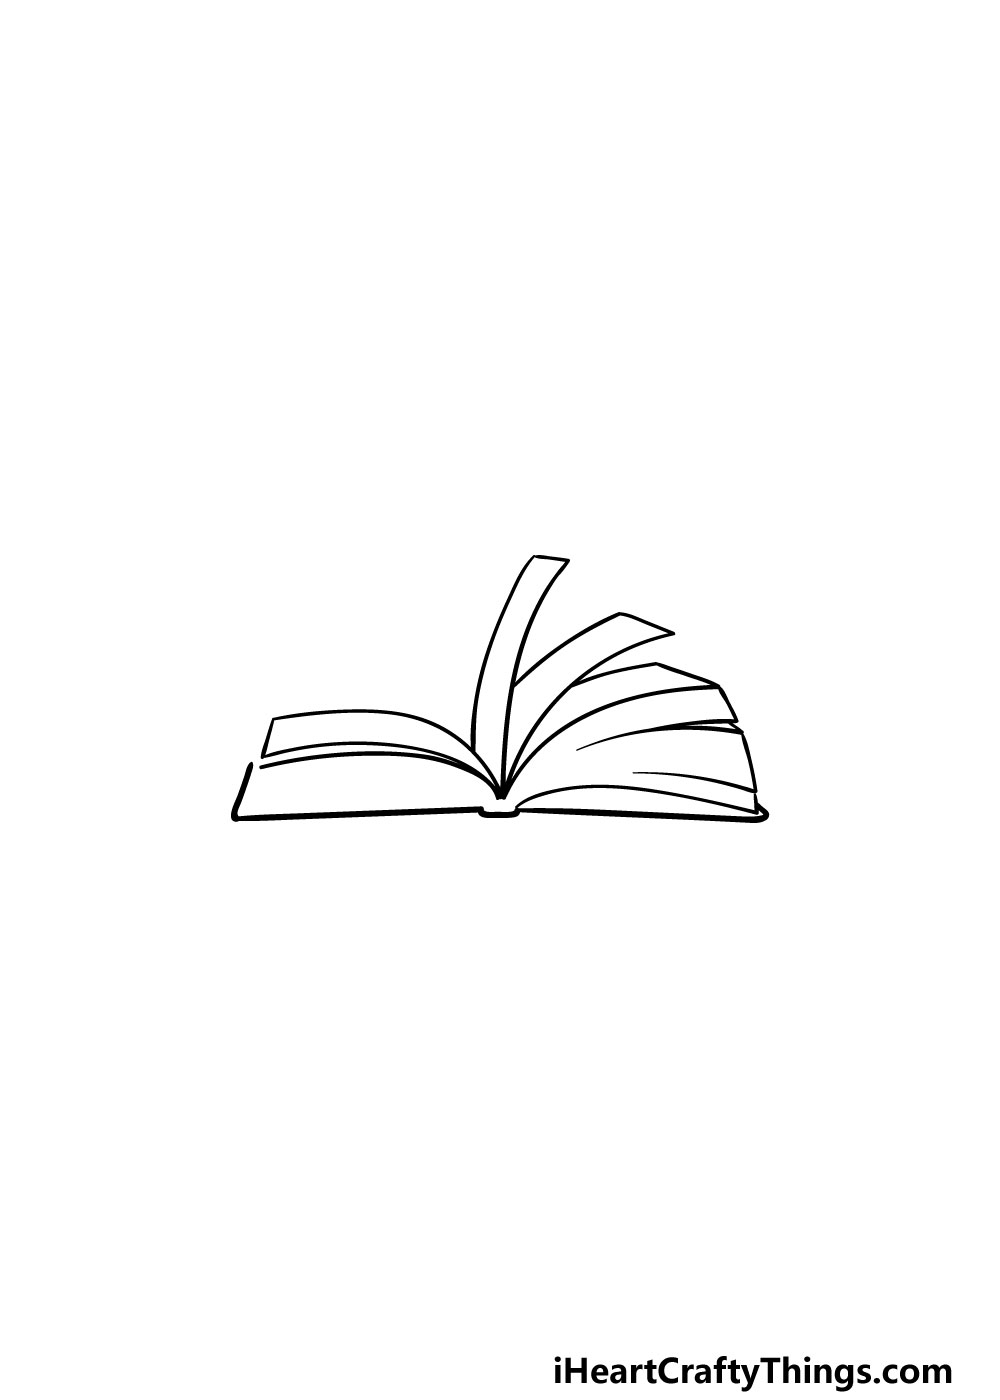
For this step of our guide on how to draw an open book, we will be finishing off some more of the flapping pages that you started in the previous step.
To do this, you can use some curved lines to connect some of the lines that you drew in the previous one. These will connect them to create more of those thin rectangle shapes that you drew already.
Step 4 – Now, draw the rest of the cover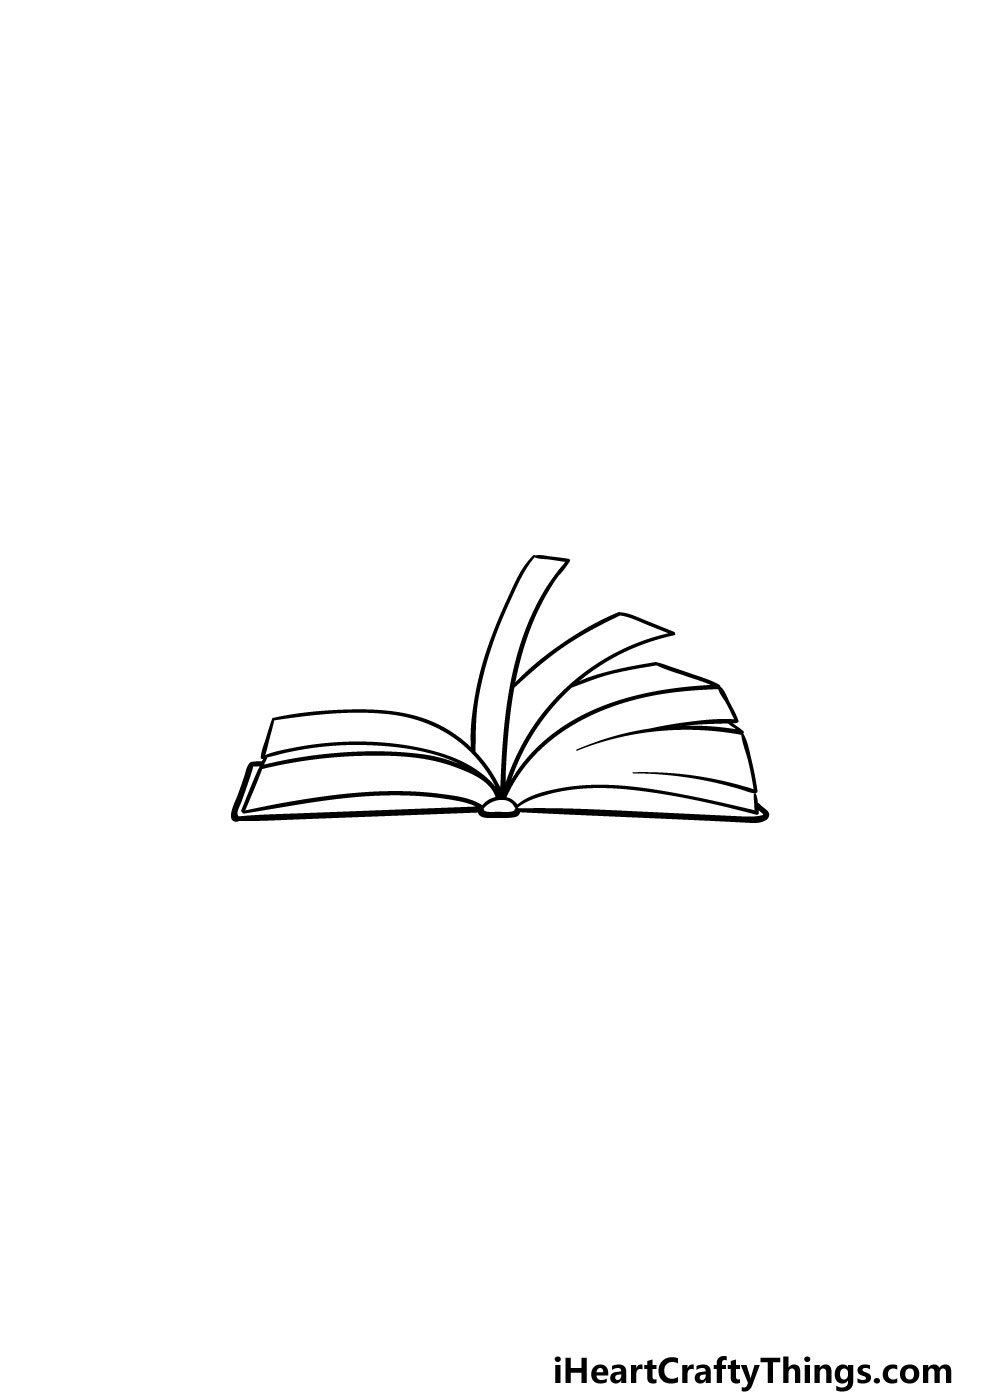
Before we will start to add some final details to your open book drawing, we will finish off the outline of the cover.
Using some straight and curved lines, carefully draw the rest of the shape that will form the cover flat on the left-hand side of the book.
That's all there is to it for this step, and then it's on to those final details that we mentioned!
Step 5 – Finish off the final details and elements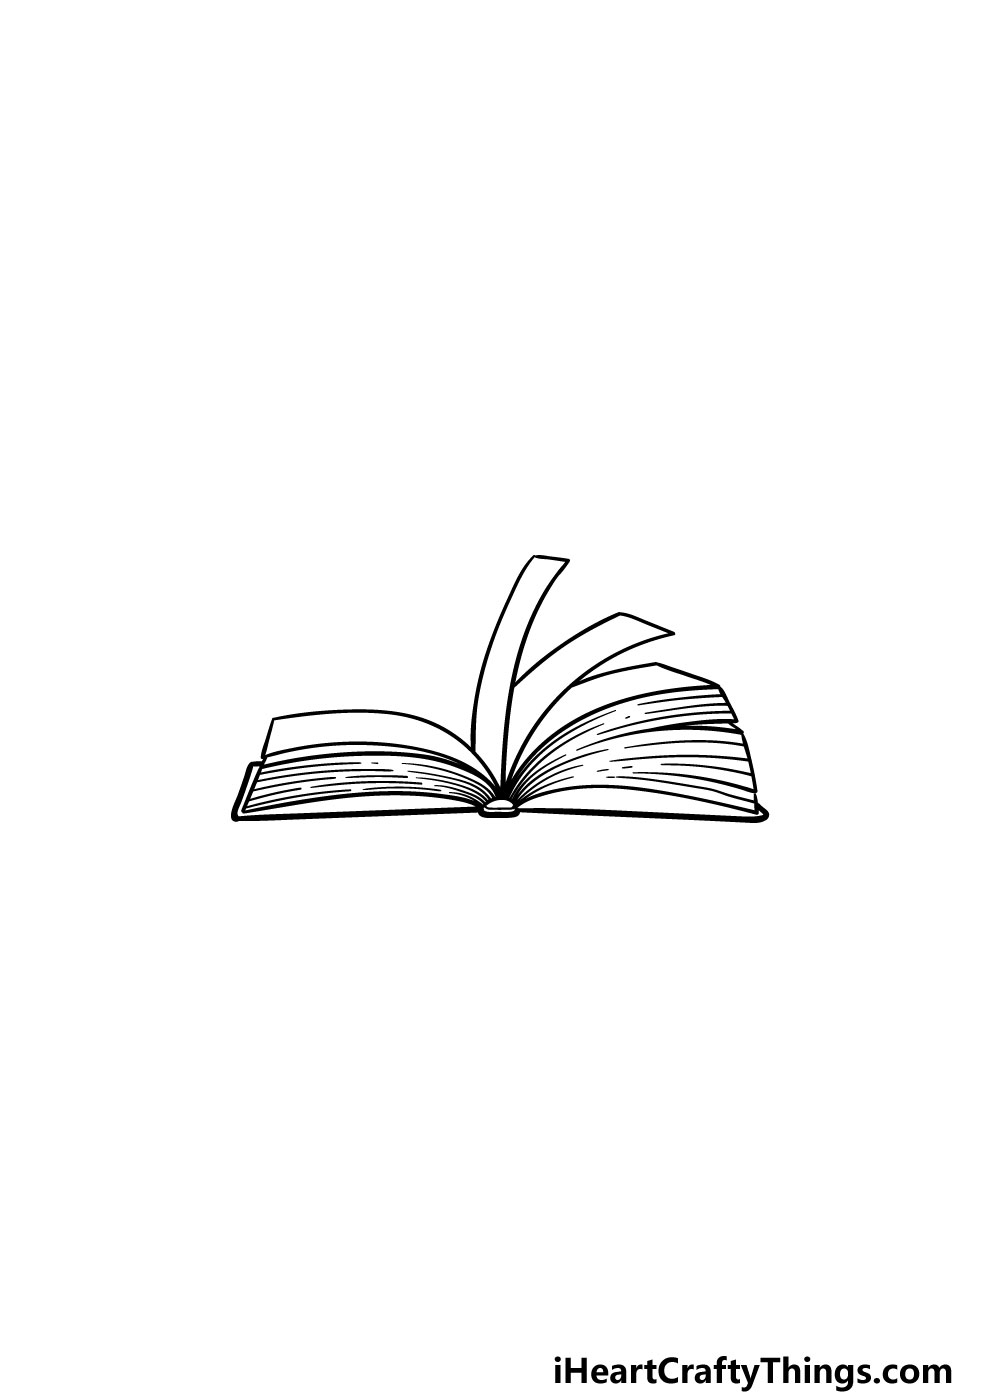
In this step of our guide on how to draw an open book, we will be finishing off the final details to have you ready for some coloring fun! These details will mainly be used to finish off the effect of the flapping pages.
To do this, you can add lots of thin, curved lines closely together inside the rectangle shapes that you drew in the previous shapes. This will give the appearance of lots of pages closely together.
That will do it for our details, but you can also add some of your own! You could draw a background to show the kind of room this book is in or draw more books around it.
Maybe you could also draw a scene from your favorite book projecting out of this open book for an extra creative angle on it!
These are just a few ideas you could go for, so what else can you think of to have this picture ready for the final step?
Step 6 – Finish off your open book drawing with some color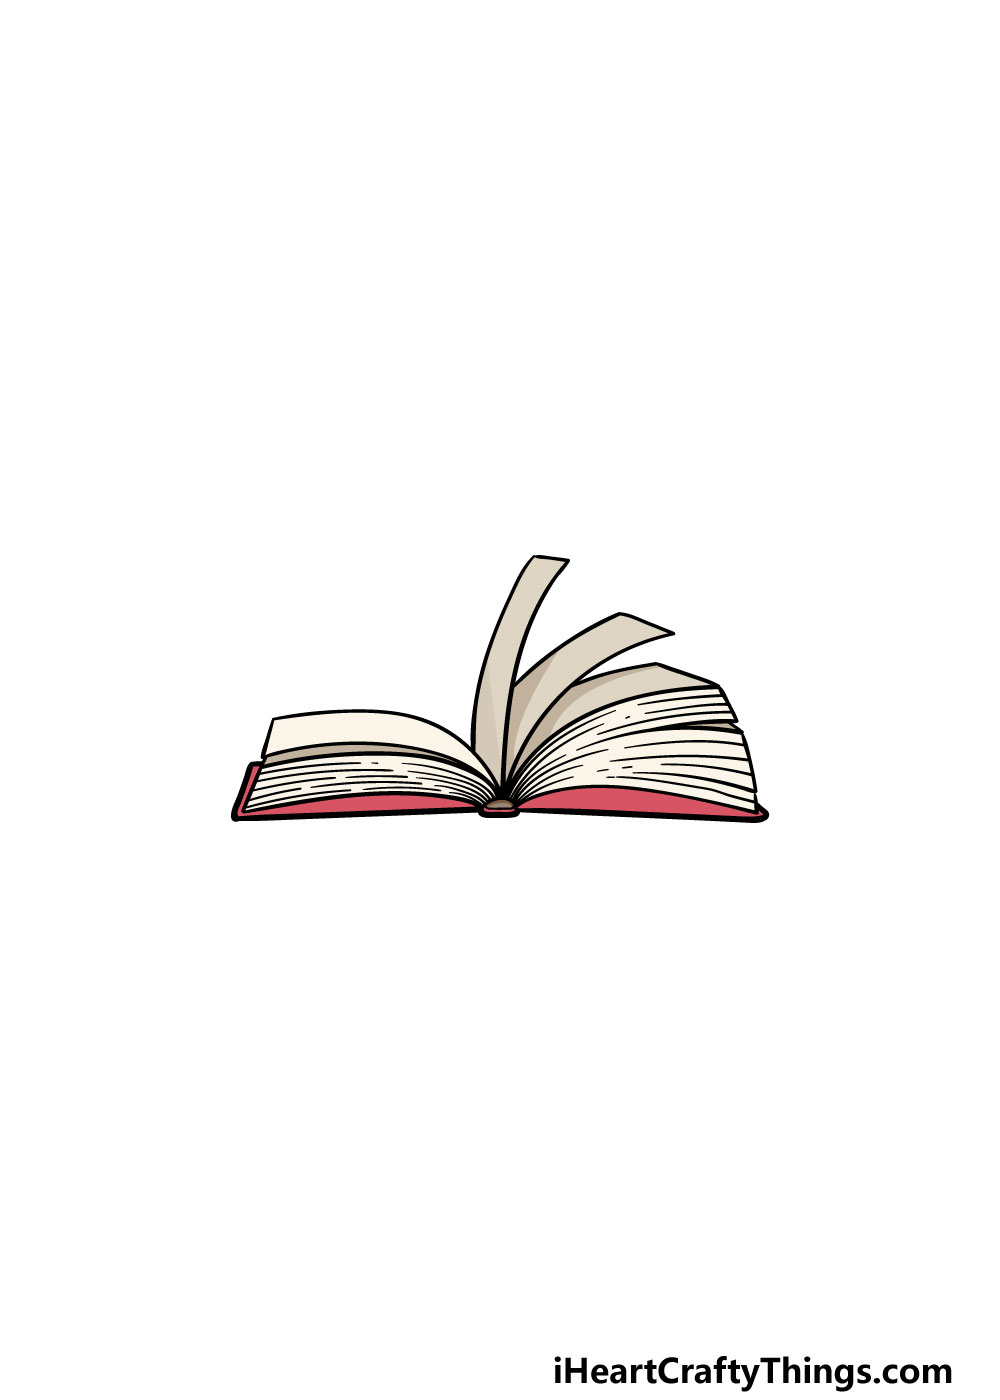
You have reached the final step of your open book drawing, and this one is a really fun step! You worked hard creating this picture, and this step will let you kick back, relax and have some good times coloring in.
In our reference image, we used some beige colors for the pages and red for the cover. This is just one color approach that you could go for, however! This is your drawing and you're in charge, so you can use any colors that you love to fill it in!
Coloring the book is just one part of it, too. If you created a background or drew any additional objects then those will be very useful for adding even more great colors to your image. Choosing the colors is just part of it, too, as you can also have some fun choosing your favorite art mediums to use to fill in this drawing.
You could use mediums such as acrylic paints and colored pens to keep this drawing bright and vibrant. Watercolor paints and colored pencils would work better for more muted colors, and you could mix a bunch of mediums too!
Your Open Book Drawing Is Complete!
It's time to close the book on this guide on how to draw an open book! This guide had a few tricky details to it, but by following this guide and taking it slow we hope that you found this drawing to be easy and fun to do.
Finishing this guide is just part of the fun that you can have! You can add some of your own elements and details as well, and we covered a few ideas earlier in the guide. You could go for some of these or add any ideas of your own to put your own spin on this picture!
The drawing fun also continues on our website, where we have some incredible drawing guides for you to enjoy. We also upload new ones frequently, so there is plenty of fun coming your way!
Once your open book drawing is finished, we can't wait to see it! You can let us take a look by sharing it on our Facebook and Pinterest pages.